Configure your clinic call interface
What platform role do I need - Org Admin, Clinic Admin
Clinic administrators have the option to configure the call screen settings, including choosing the background colour, setting the default video feed size for hosts and adding a logo to brand their clinic Video Call interface. If your organisation’s call interface has been configured, these changes will apply to all newly created clinics in the organisation. You can, however, override the organisation configuration by, for example, uploading a clinic specific logo.
How to configure your Clinic Call Interface
1. From your Clinic waiting area page click on Configure and click on the Call Interface tab.

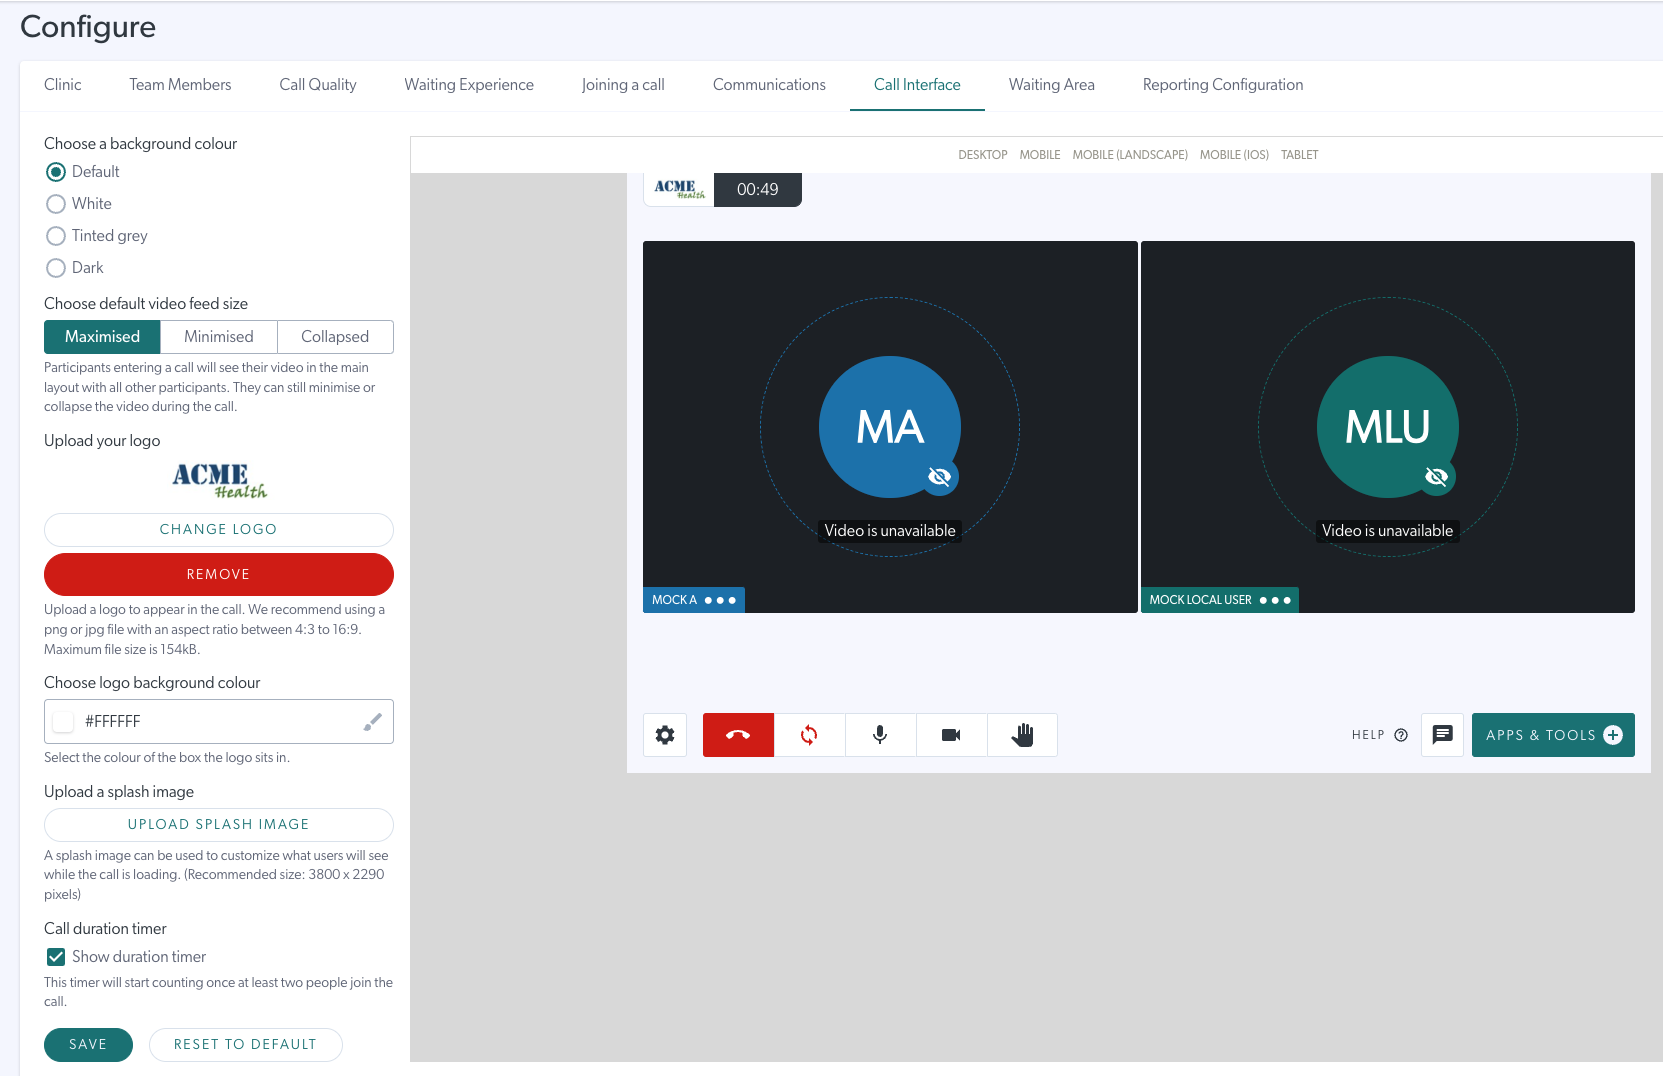
2. You will see options available to configure the call screen. In the below example the background colour has been changed to Tinted grey, Minimised has been selected as the clinic default self-view and a logo has been uploaded. You can also upload a Splash image, if desired, and choose whether to show the call duration timer in the call screen. Any configuration changes are shown in the graphic display to the right of the config options.
Clinic administrators can change any of these settings as required for their clinic, as shown in the steps below:
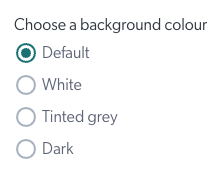
3. Choose a background colour – there are four options to choose from.
4. Choose the desired default self-view option for all calls in the clinic. This option will be the default view in the call screen when a team member joins a call, however users can change their self-view setting when in a call, if desired, using the minimise, maximise and hide buttons in their video window.
There are three configuration options for the default local video (self-view). These options are:
- Maximised: Calls open in the standard view (loacal video on the right and the remote participant on the left)
- Minimised: Local video is minimised but still visible
- Collapsed: Local video is hidden from your view
The below image shows the configuration steps and options. In this example Minimised is selected as the default view in the clinic:

5. Upload a logo for your clinic which will appear at the top left of the call screen. The maximum file size is 5MB. The pixel size has a maximum height of 36 pixels with the width maximum being 138 pixels. Please ensure that the logo is not more than 3.8x wider than the height.

Once uploaded you will see your logo in the top left of the call screen when in a Video Call and can change or remove as required.

6. Upload a splash image – this image is visible as the background while the call window is loading (when you click on Join a call) and only shows briefly.
Once uploaded you can change or remove your splash image.

7. The Call duration timer is enabled by default, however you can disable it for all calls in the clinic if you prefer.

8. Click Save at the bottom of the configure options, to save any changes. You can also easily reset all call interface settings to default.
