របៀបជ្រើសរើសវិសាលភាព ឬកាមេរ៉ានៅក្នុងការហៅជាវីដេអូ
ជ្រើសរើសកាមេរ៉ាពេទ្យ ឬវិសាលភាពដើម្បីចែករំលែកនៅក្នុងការហៅទូរសព្ទរបស់អ្នក។
មានវិធីជាច្រើនក្នុងការចែករំលែកកាមេរ៉ា ឬវិសាលភាពទៅក្នុង Video Call អាស្រ័យលើតម្រូវការគ្លីនិករបស់អ្នក។ ឧទាហរណ៍ខាងក្រោមបង្ហាញពីជម្រើសដែលមាន៖
|
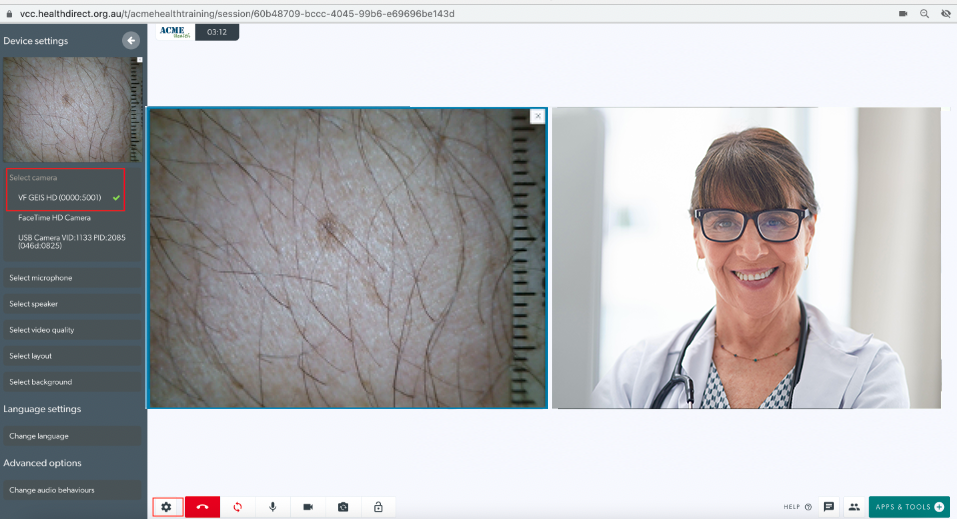
1. អ្នកផ្តល់សេវាសុខភាពជាមួយអ្នកជំងឺអាចដោតឧបករណ៍ USB ចុចលើ Settings cog (បន្លិចនៅខាងក្រោមខាងឆ្វេង) ដើម្បីបើកផ្ទាំង Settings ហើយជ្រើសរើសឧបករណ៍ជាកាមេរ៉ារបស់ពួកគេ (ប្តូរកាមេរ៉ា)។ វានឹងជំនួសមុខងារកាមេរ៉ារបស់ពួកគេ ដូច្នេះអ្នកឯកទេសនៅចុងម្ខាងទៀតនឹងមិនឃើញពួកគេ ឬអ្នកជំងឺរបស់ពួកគេនៅលើអេក្រង់ទៀតទេ។ ពួកគេក៏អាច ប្តូរកាមេរ៉ារបស់ពួកគេ ដោយចុចលើរូបតំណាងប្តូរកាមេរ៉ានៅក្នុងការគ្រប់គ្រងការហៅទូរស័ព្ទខាងឆ្វេងខាងក្រោម។ |
 |
|
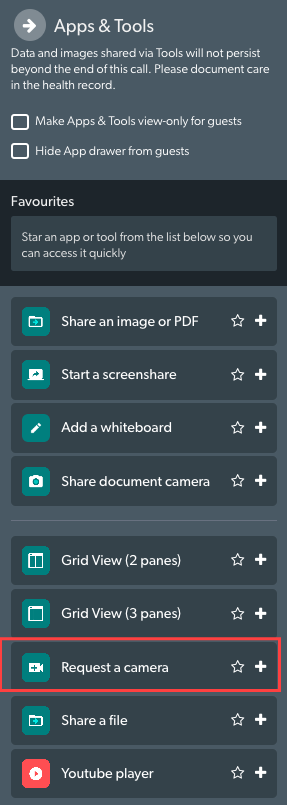
2. ក្នុងអំឡុងពេលហៅជាវីដេអូ អ្នកឯកទេស ឬវេជ្ជបណ្ឌិតអាច ស្នើសុំកាមេរ៉ា ពីអ្នកផ្តល់សេវាសុខភាពដែលនៅជាមួយអ្នកជំងឺ។ ដើម្បីធ្វើដូច្នេះ ពួកគេចូលទៅកាន់ Apps & Tools ហើយជ្រើសរើស Request a camera ។ |
 |
|
នៅពេលដែលបានស្នើសុំ អ្នកផ្តល់សេវាសុខភាពដែលនៅជាមួយអ្នកជំងឺ នឹងឃើញអេក្រង់នេះ។ ពួកគេចុចលើ ជ្រើសរើសកាមេរ៉ា ដើម្បីចែករំលែក ដើម្បីចូលប្រើបញ្ជីទម្លាក់ចុះនៃជម្រើស។ |
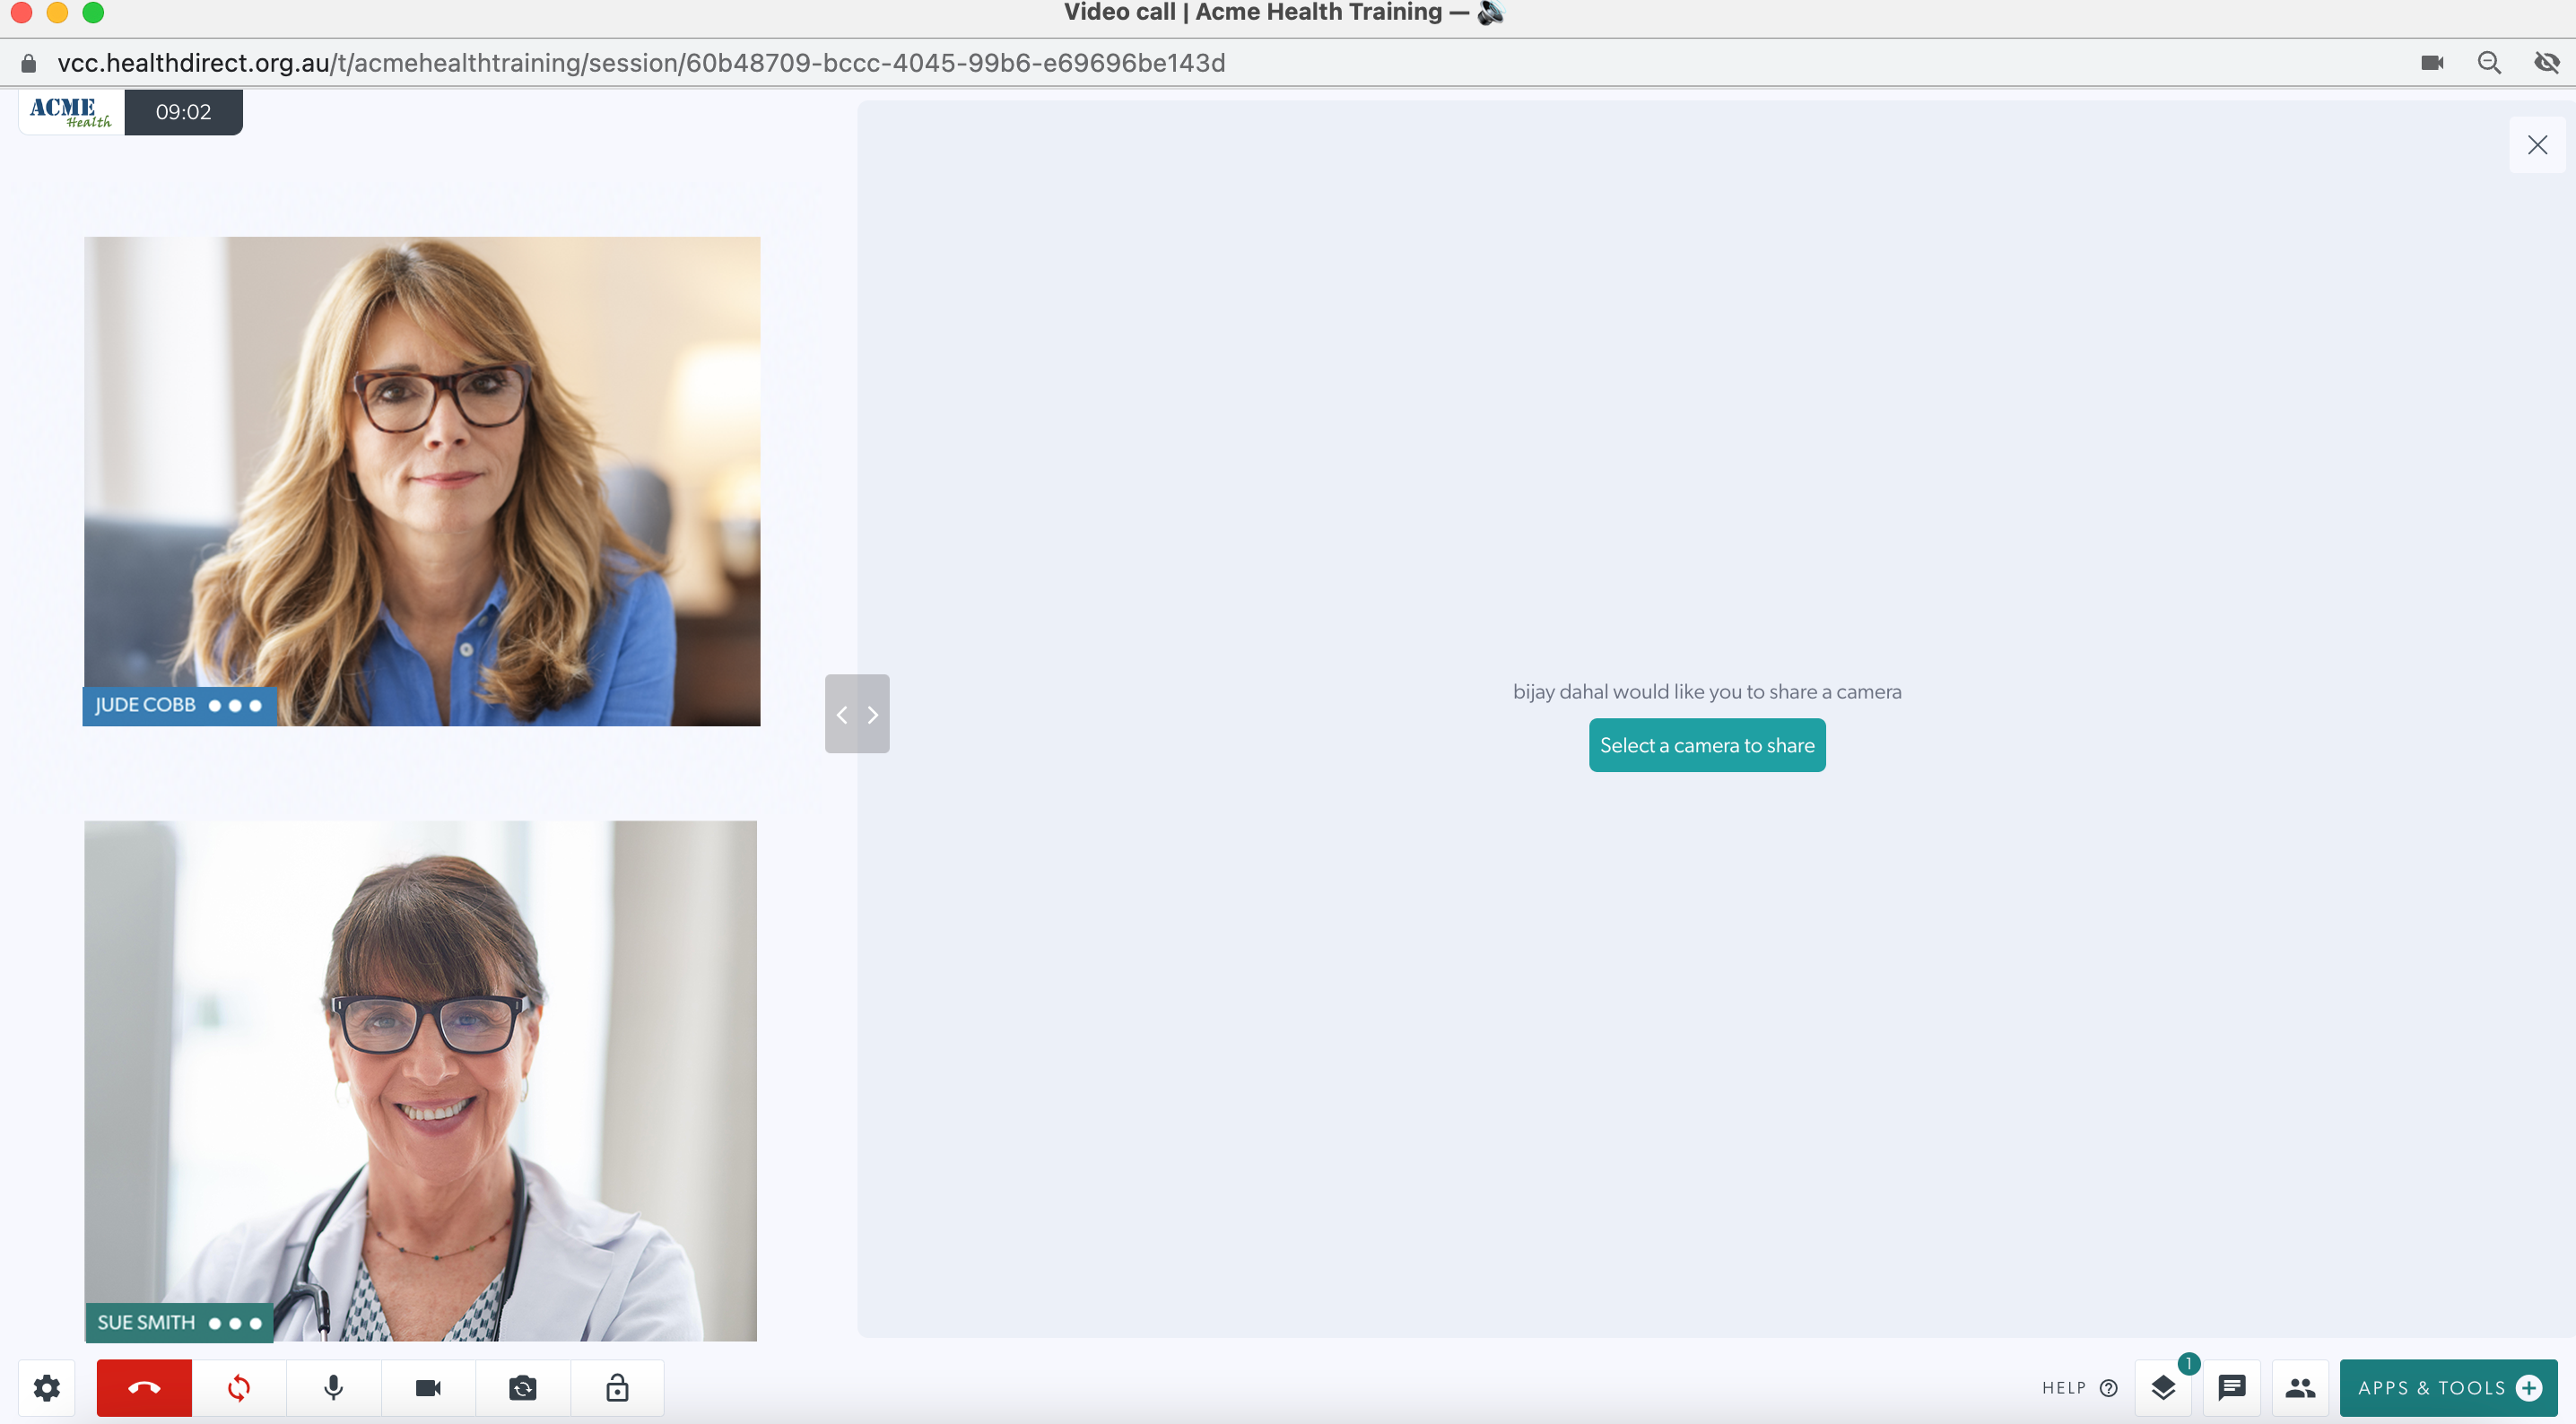 |
| ពីបញ្ជីកាមេរ៉ាដែលមាន ពួកគេជ្រើសរើសឧបករណ៍វេជ្ជសាស្ត្រដើម្បីចែករំលែកក្នុងការហៅទូរសព្ទ។ ជាមួយនឹងដំណើរការការងារនេះ អ្នកចូលរួមទាំងអស់នឹងនៅតែមាននៅលើអេក្រង់ នៅពេលដែលវិសាលភាព ឬការស៊ើបអង្កេតចែករំលែកនៅក្នុងការហៅទូរសព្ទ។ | 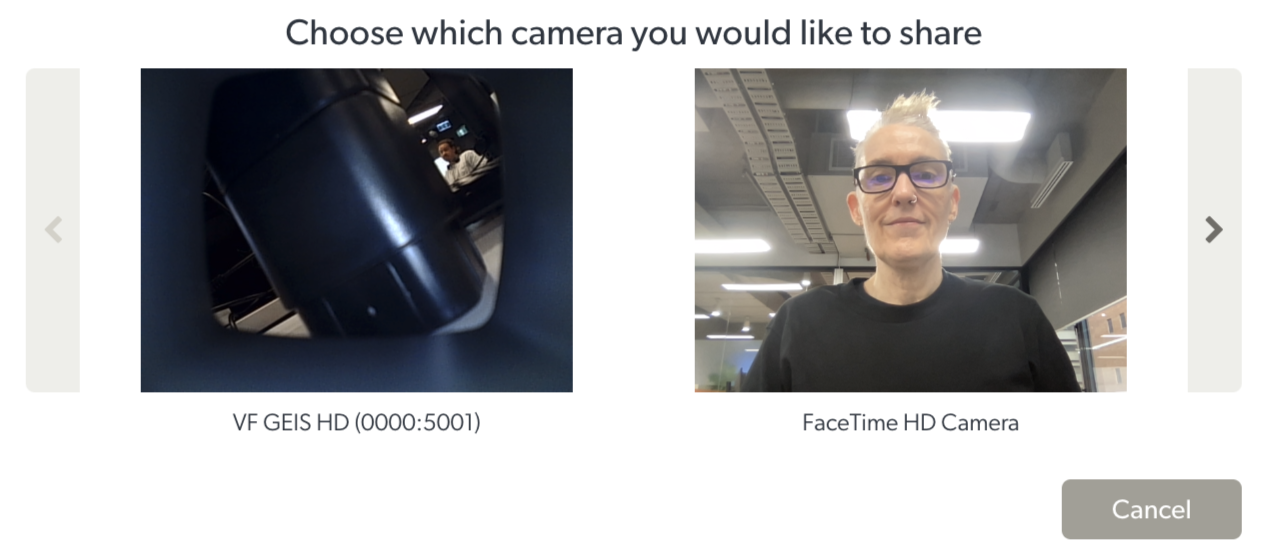 |
| អ្នកឯកទេស មើលកាមេរ៉ាដែលបានចែករំលែកមានជម្រើសក្នុងការជ្រើសរើស គុណភាពវីដេអូ ដូចដែលបានបន្លិចក្នុងរូបភាពខាងក្រោមក្រោមរូបភាពកាមេរ៉ាដែលបានចែករំលែក។ វិសាលភាពជាច្រើនមាននិយមន័យខ្ពស់ពេញលេញ ដូច្នេះ កម្រិតខ្ពស់ អាចត្រូវបានជ្រើសរើស។ | 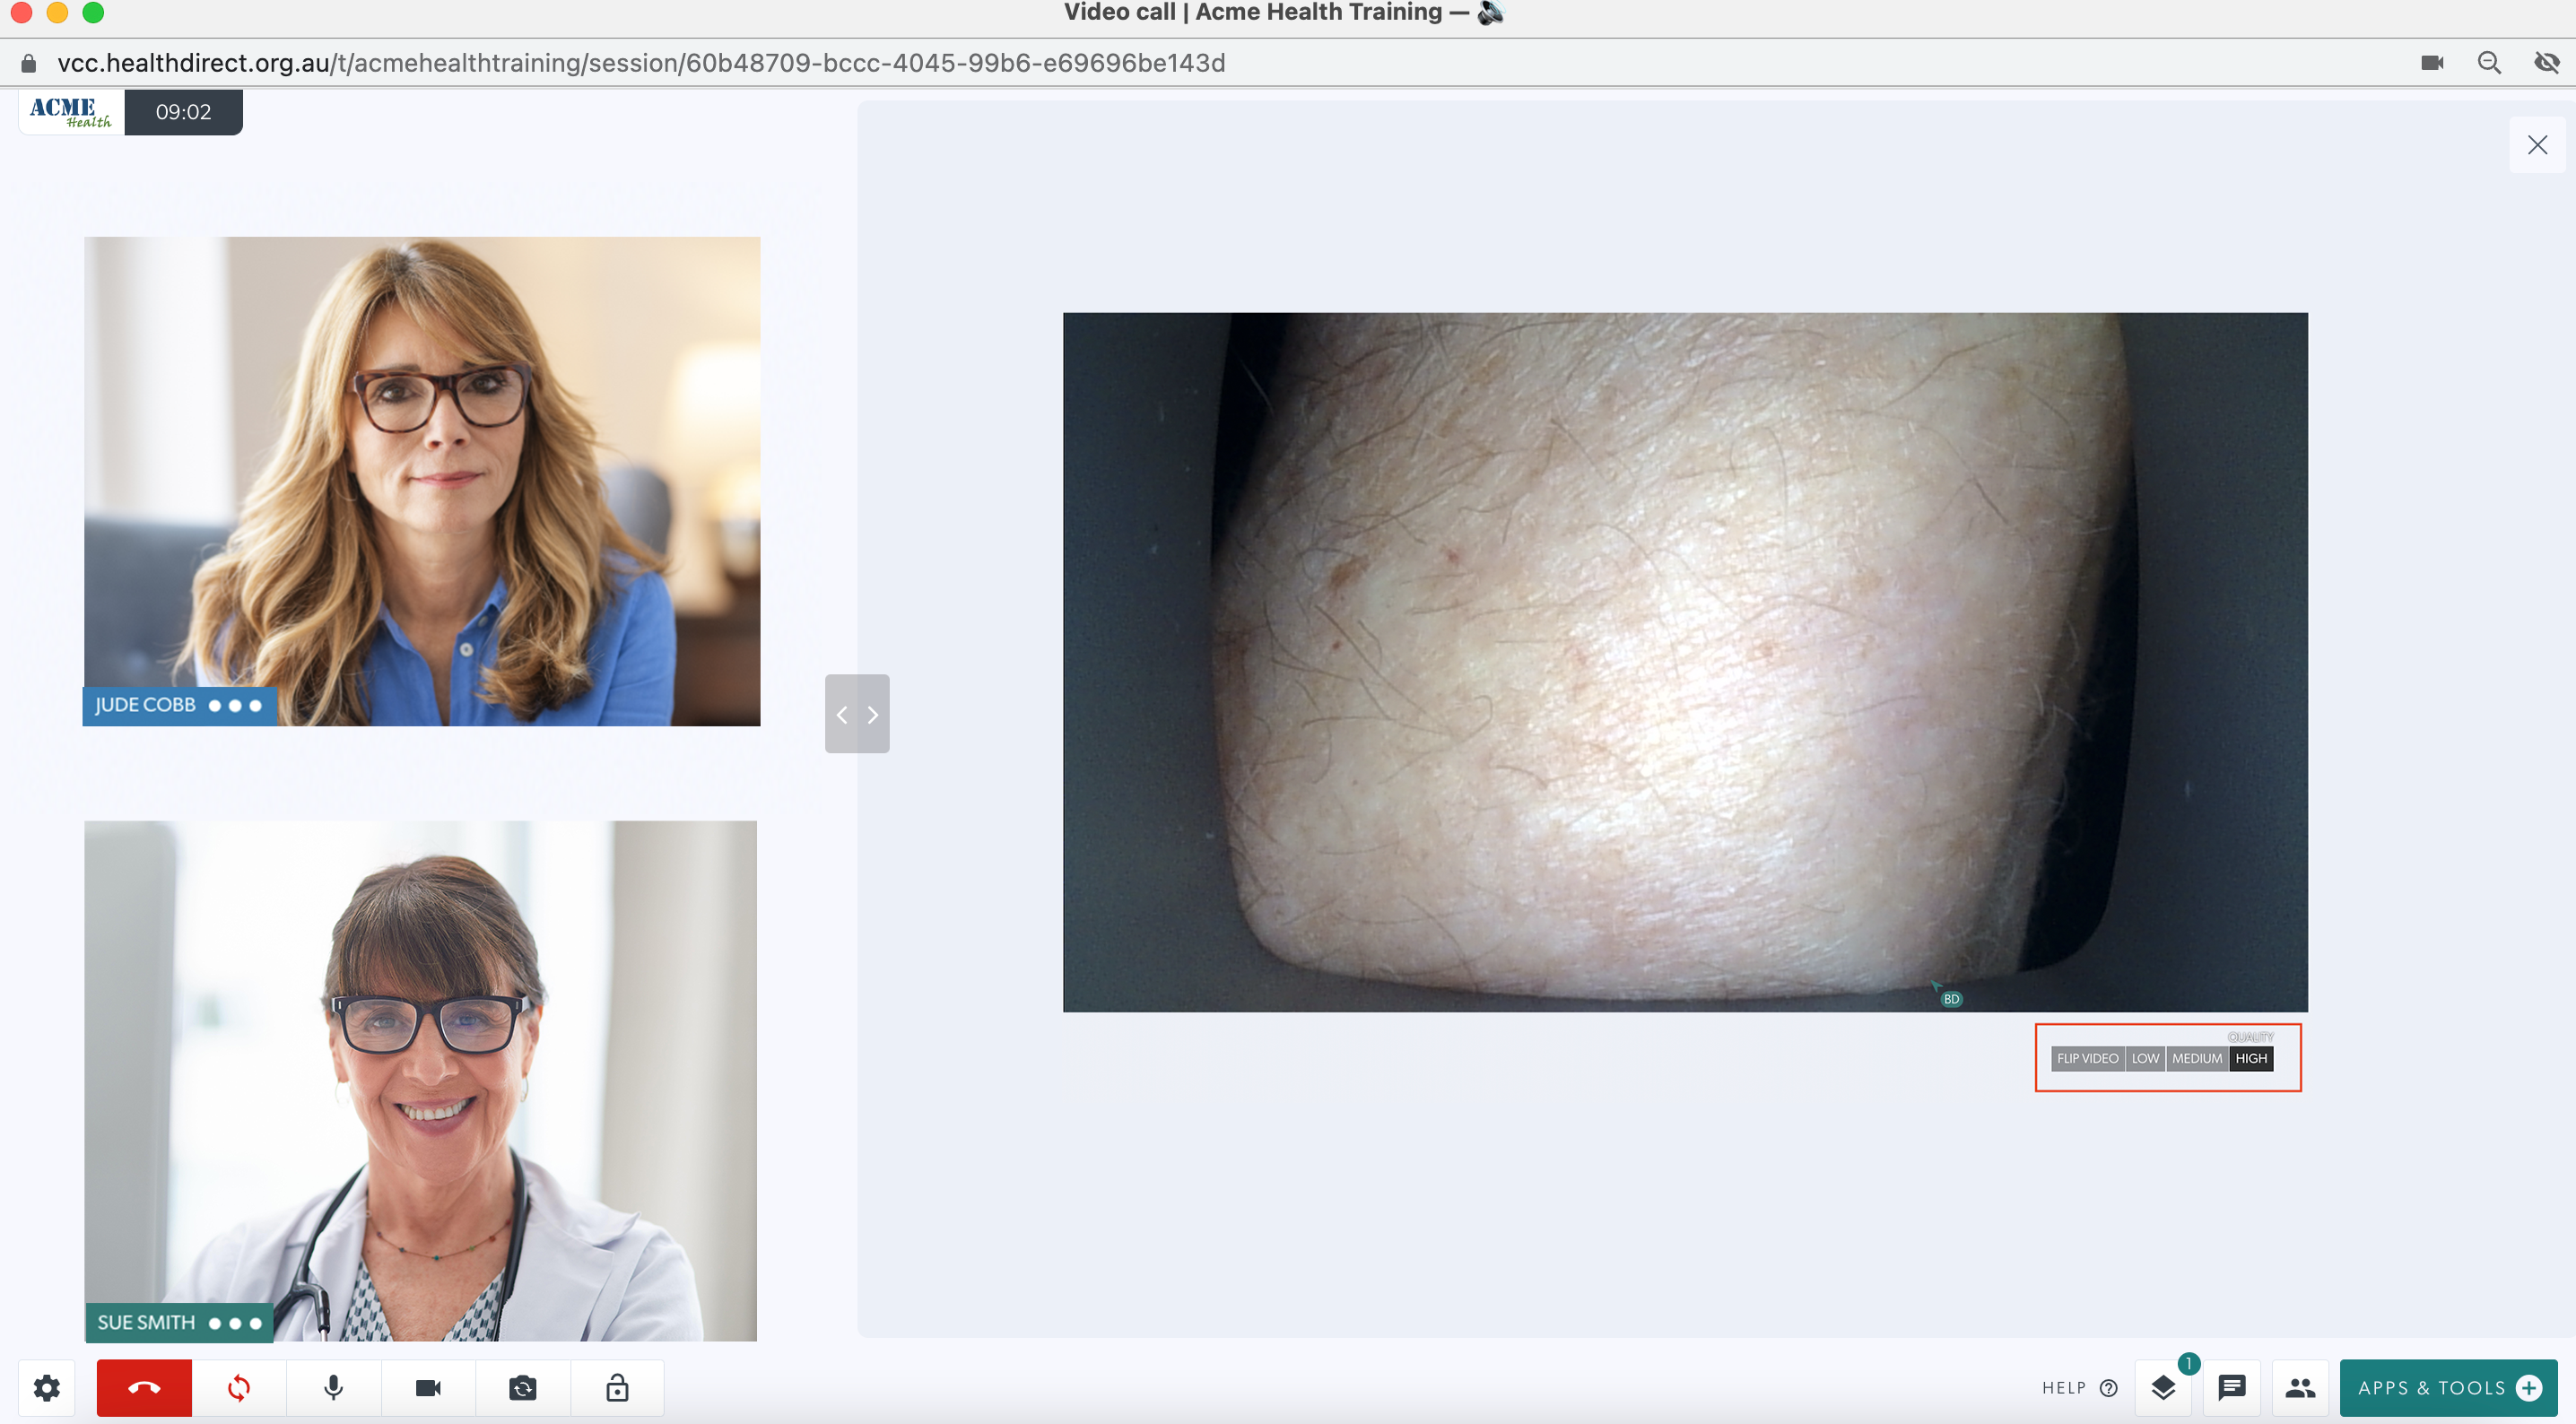 |
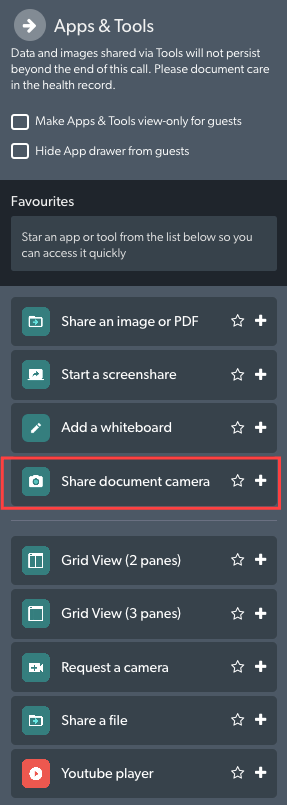
| 3. អ្នកផ្តល់សេវាសុខភាពជាមួយអ្នកជំងឺ អាចជ្រើសរើសជម្រើសដើម្បី ចែករំលែក កាមេរ៉ាឯកសារ ចូលទៅក្នុងការហៅទូរសព្ទ។ សូមចំណាំថាជាមួយនឹងជម្រើសនេះ អ្នកអាចចែករំលែកកាមេរ៉ាបន្ថែមណាមួយចូលទៅក្នុងការហៅទូរសព្ទ ហើយវាគាំទ្រកាមេរ៉ា ដែលមានគុណភាពបង្ហាញខ្ពស់ ។ ចុចលើ Share Document Camera នៅក្នុង Apps & Tools ហើយប្រអប់ជ្រើសរើសនឹងបង្ហាញបង្ហាញកាមេរ៉ាដែលមានសម្រាប់ឧបករណ៍របស់អ្នក។ ជ្រើសរើសកាមេរ៉ាដែលត្រូវការ ហើយវានឹងត្រូវបានបញ្ចូលក្នុងការហៅទូរសព្ទ។ |
|